How to Submit New Product

Step by step guide on submitting new product and getting the best preview.

[0:33]Introduction

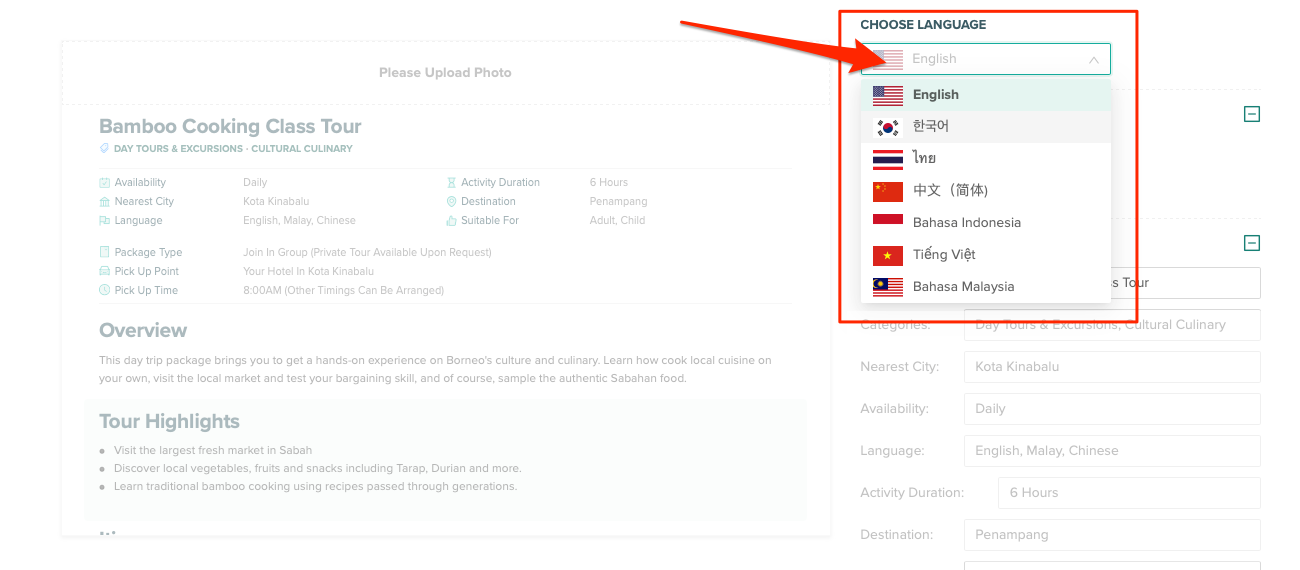
[0:52]Choose Language

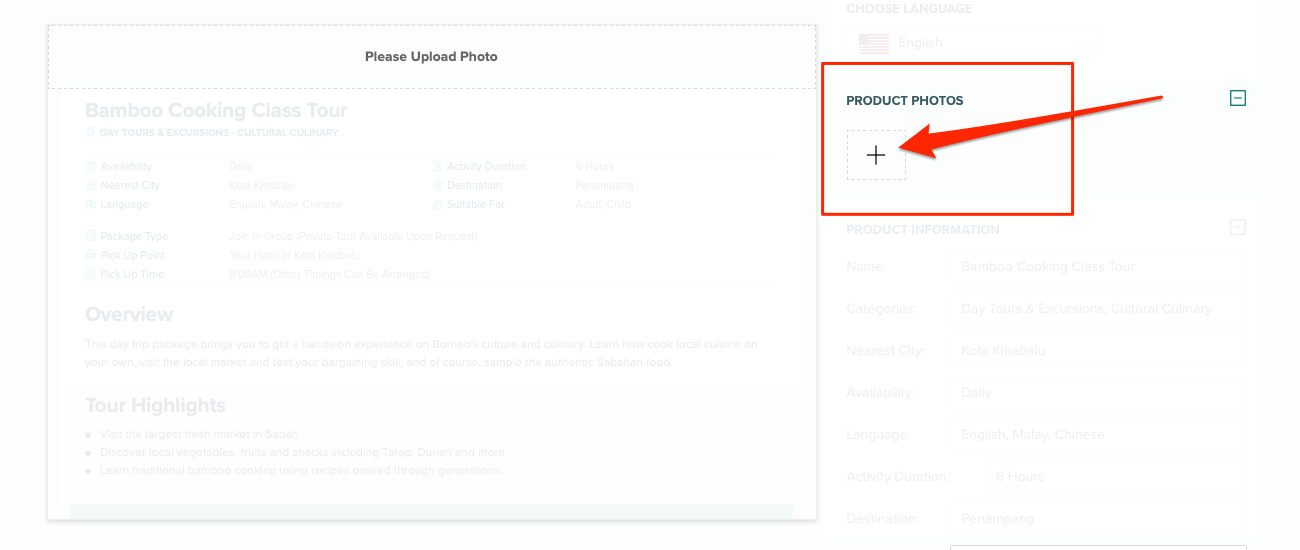
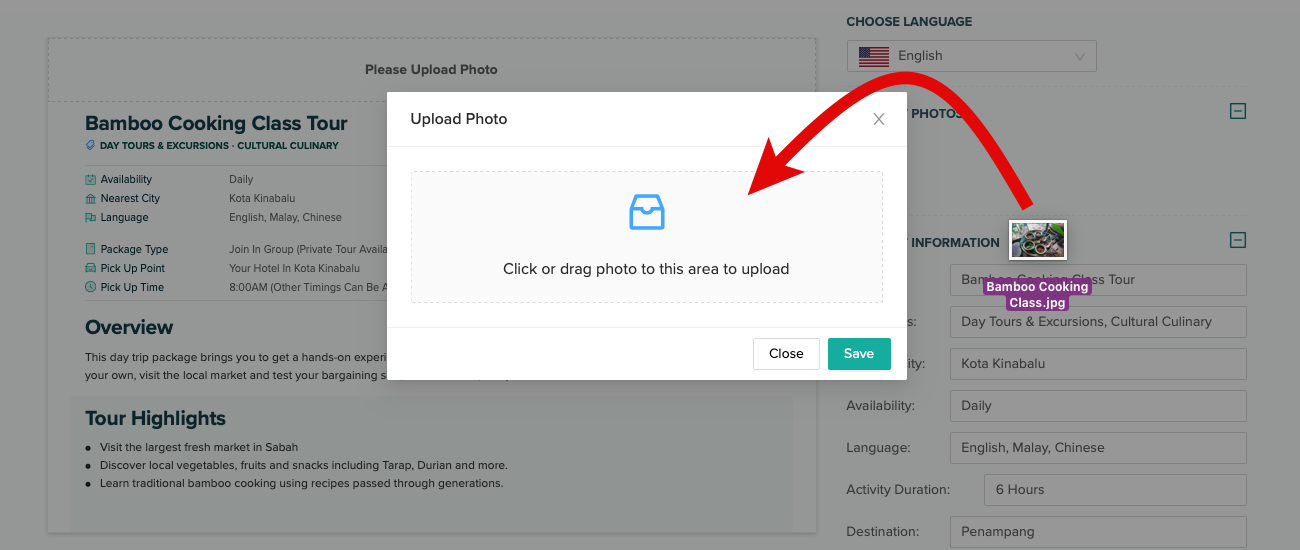
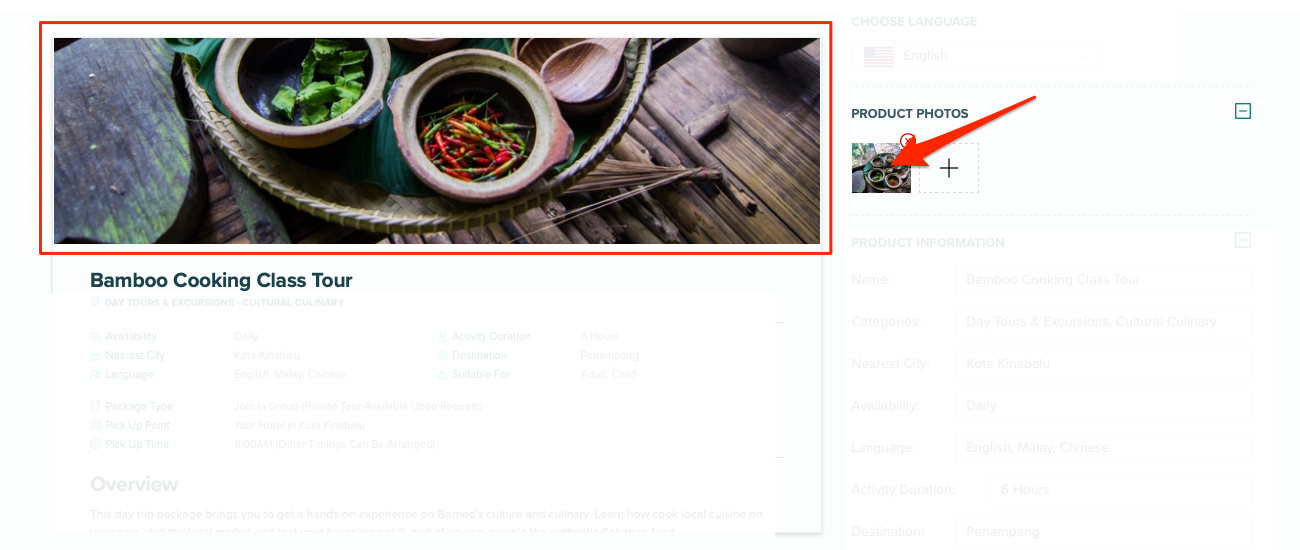
[0:57]Upload Photo

[1:16]Fill in Product Information

[2:17]Product Overview

[2:41]Tour Highlights

[3:10]Itinerary

[4:05]Inclusions, Exclusions, etc.

[6:02]Submit Product for Approval

[6:18]Submitted Product Approval

I Want to Sell A Product in SabahTravel. How to Start?

First, submit your product proposal to SabahTravel Account Manager, email to business@sabahtravel.com and attach product details (such as product name, itinerary, product pricing, product highlights, soft copy flyers) in the email. You may upload these information into any cloud sharing platform, and put a cloud-sharing URL into the email.

After you have send your proposal to business@sabahtravel.com, notify SabahTravel Account Manager for immediate action.

SabahTravel Account Manager will review your product proposal.

Once your product is approved to be sell in SabahTravel platform, the SabahTravel Account Manager will create a link of you, and you will receive the link through email.

Then, you can start filling in the details into Product Editing page via the link by yourself.  

So, please check your email frequently after you have submitted/proposed any products to SabahTravel Account Manager.

Contact SabahTravel Account Manager if you haven't had received any response. 
Understanding the Interface & Good Practice

Understand the Interface

In this part, you will learn how to fill in Product Editing Page effectively.

Firstly, check your email and look for email from SabahTravel.

Click the link in the email. You will be landing on a Product Editing page to fill up your product details.

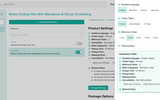
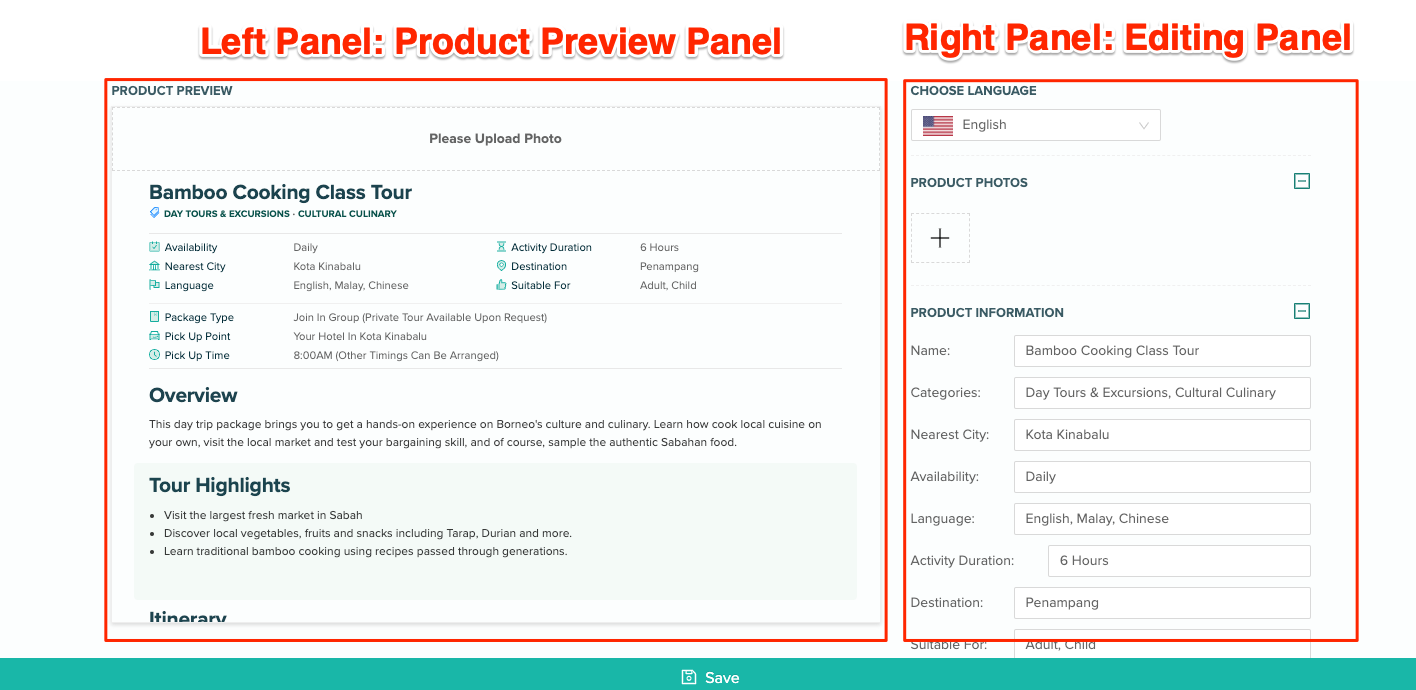
There will be 2 panels in the Product Editing Page (see screenshot below): 

  • Left Panel: Product Preview 
  • Right Panel: Editing Panel (Product Information).

All the information you have input into the right panel will be reflected in Left Panel (Product Preview).

Product Preview Panel also act as a mock preview of real product. You may adjust the all the details in Editing Panel to achieve desire product preview in SabahTravel Product Page.

Good Practice

Always click “Save” button on the below of the page after editing any components to make sure you do not lose any data during technical interruption such as lost connection.

How to Fill Up Product Details (Step-by-Step)

Step 1. Choose Language

To get started, select the language of your product information.  

Click on â€śCHOOSE LANGUAGE”. SabahTravel platform providing English, Korean, Thai, Mandarin, Bahasa Indonesia, Vietnamese, and Bahasa Malaysia.  (more to come)

Step 2. Upload Photo

Upload your product photo. 

Photo Criteria please refer here: How to Manage Inventory > Adding Product Photo.

Click “Save” before you proceed to Step 3 to fill in Product Information. 

Step 3. Fill In Product Information

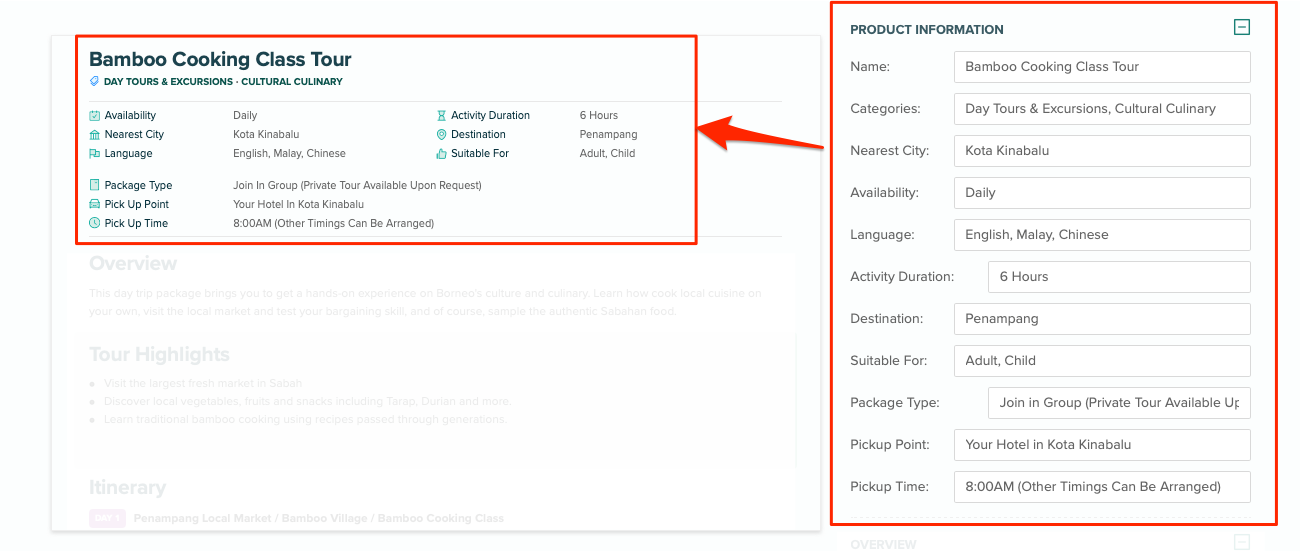
There are several components that you need to fill in. See examples in the screenshot below.

  • Name: The product name.
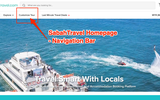
  • Categories: What are the categories that the product should be placed on the website? Refer to SabahTravel homepage for Categories Selection. Use "," to indicate more options.
  • Nearest City: What is the nearest city to your product?
  • Availability: What is your product availability?
  • Language: What is the language of your product/service provided? Use "," to indicate more options.
  • Activity Duration: How long is your product duration?
  • Destination: Where is your product located?
  • Suitable for: Who is suitable to purchase/use your product? Use "," to indicate more options.
  • Package Type: Join-in Tour/Private Tour/others
  • Pickup Point: Where is the starting point of your service/where should the customer being pick up/where to meet up with you?
  • Pickup Time: What is the starting time of your service/what time should the customer be pickup/meet up with you?

Step 4. Product Overview

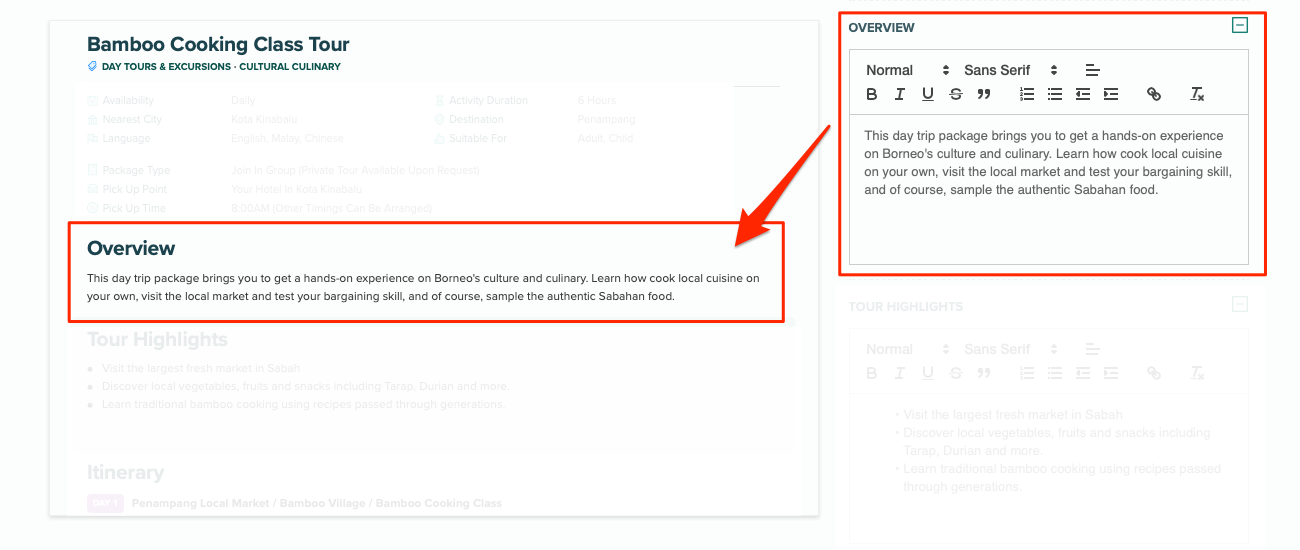
Write your product summary in a paragraph to describe your product. Make it attractive and simple. Make use of the Formatting Text Function like Font style, Heading, Bold, Italic, Underscore, Bullet, Indent, Text Align and so on to emphasis main points.

TIPS | 
âś“ Overview of your product 
âś“  5 – 7 sentences 
âś“ Mention about some Highlights/Attractions from your product 
âś“ Inclusions the customer will get from your product 
âś—  Long & non-related product description 

Step 5. Tour Highlights

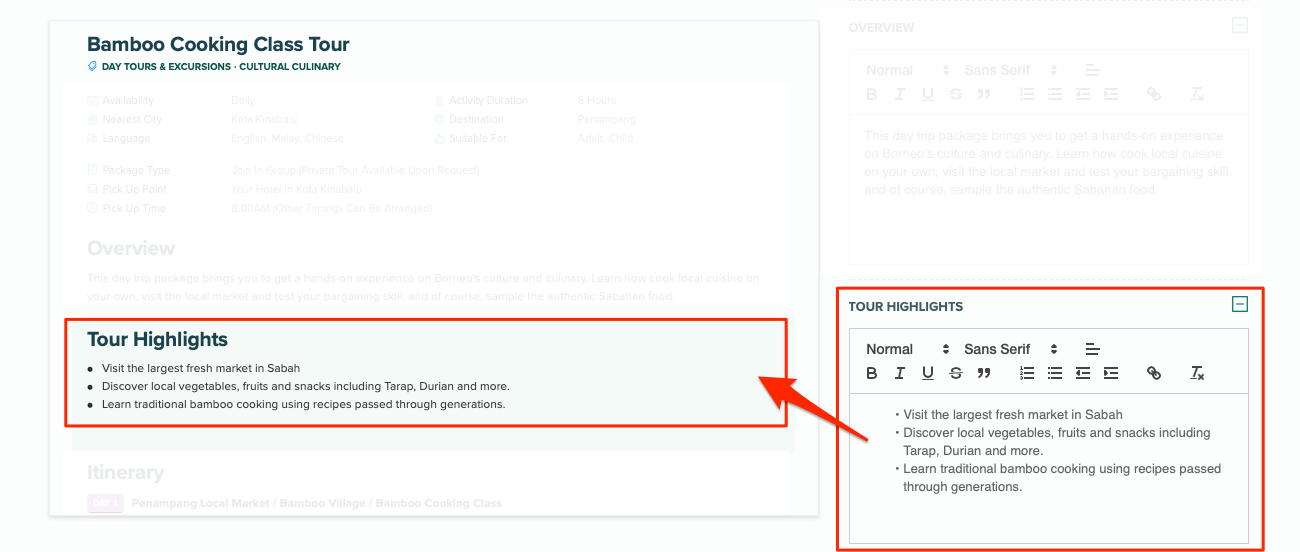
Tour Highlights are the most crucial part in your product, and it will appear in the first part of the Product Page after the brief Product Overview. Make sure you point out product selling point/what customer wanted to know most from your product. 

TIPS  | 
âś“ Short & Sweet 
âś“ 5 – 12 words in a sentence 
âś“ Selling point
âś— Long & non-related product description 

Step 6. Itinerary

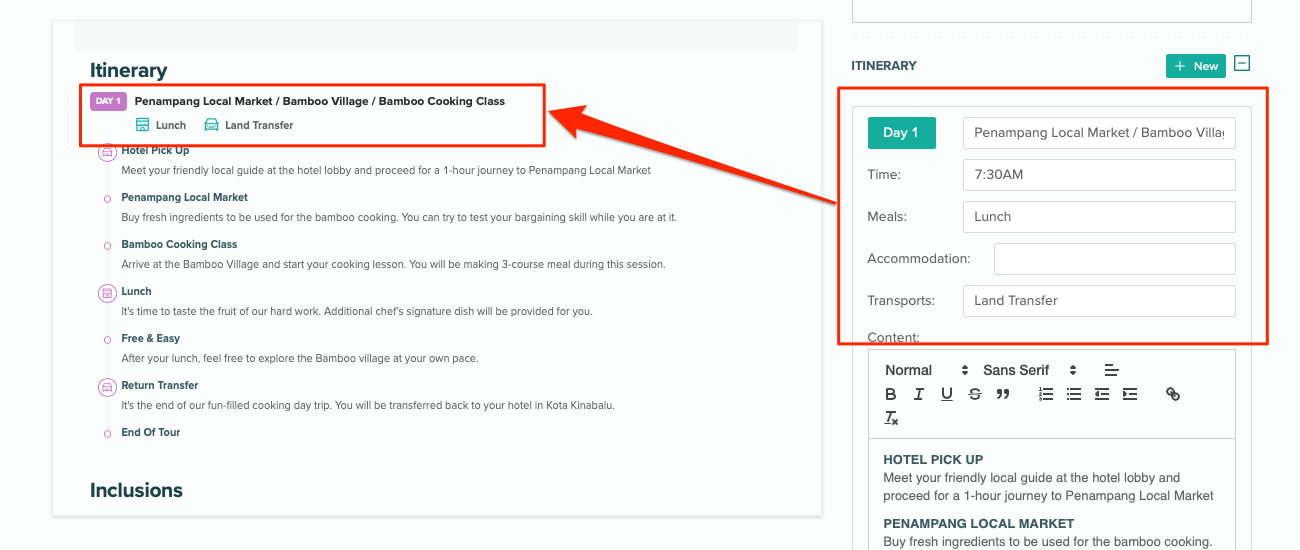
Key in product itinerary here. Fill up all the required information as in the Itinerary Form.

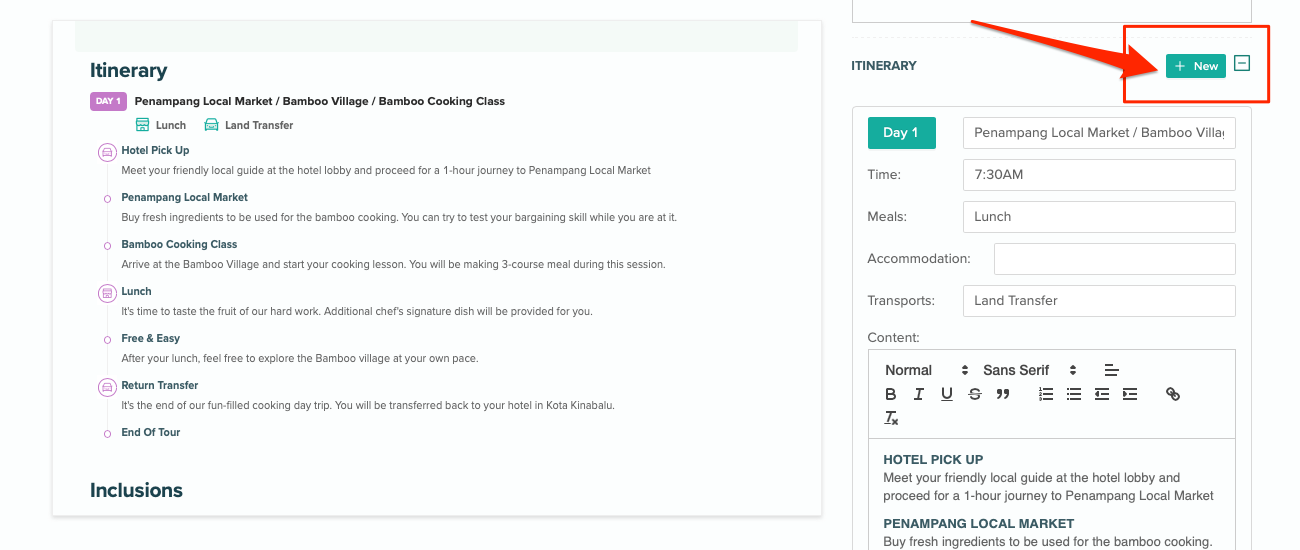
Click “+ New” to start editing. (if your product is more than one (01) day, you can click “+ New” again to create another field to fill up for the following days' product information) 

There are several components that you need to fill in. See examples in the screenshot below.

  • Title: Summary of activities/place to go in sequence. You may use "/" to indicate activities/highlights in sequence
  • Time: Product start time 
  • Meals: What meals do you providing? Use "," to indicate more
  • Accommodation: What accommodation are you providing? 
  • Transports: What type of transportation are you providing for the customer in your product? 
  • Content Itinerary of your product.
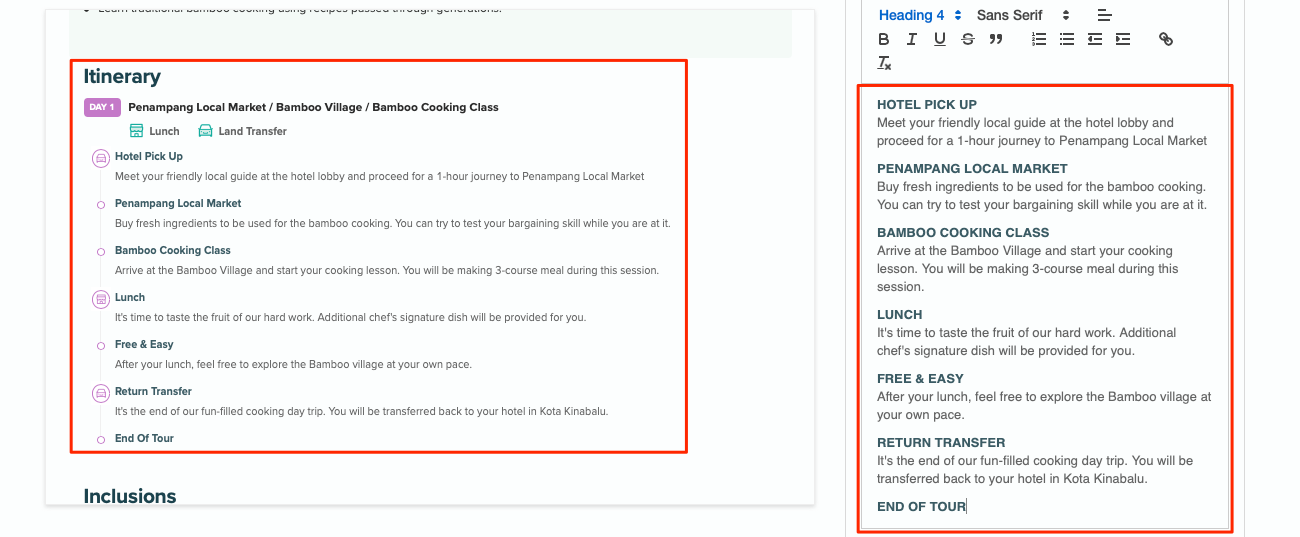
TIPS 1 | An excellent itinerary should consist of:
âś“ Start of the Itinerary
âś“ Activities of the product
âś“ Meals & what is the timing
âś“ End of the Itinerary


TIPS 2 | Criteria?
âś“ Use "Heading 4" for Title, use "Normal" for description
âś“ 1 – 2 sentences of each explanation  
âś“ Simple Language 
âś“ No repeating of title in a same-day itinerary (e.g. Lunch should not be repeated twice in Day 1 Itinerary) 
âś— Long & non-related product explanation
âś— Use bold or Upper Case (caps lock) for title

Step 7. Inclusions, Exlcusions, etc.

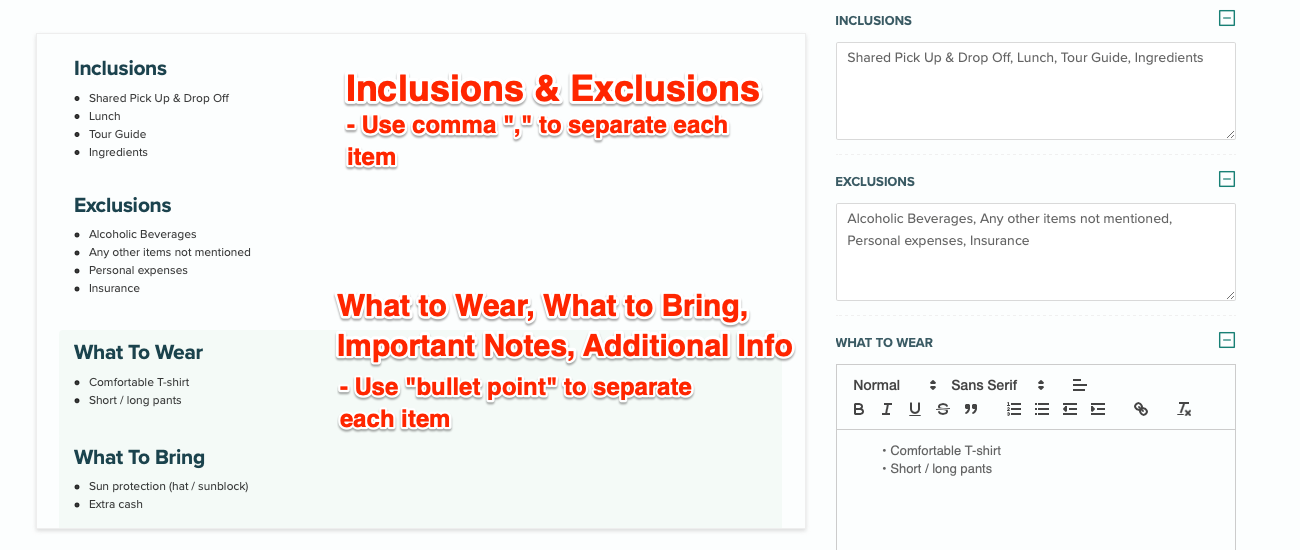
Customers will be looking through these â€śfine print” to book for your product. To make your product stand out, all the details that filled up must be exactly what you will be providing. Be transparent and honest in stating the terms and conditions. Prevent to use “etc.” in the description. 

  • Inclusions: What is included in your product? Use "," to indicate more options.
  • Exclusions: What is excluded in your product? Use "," to indicate more options.
  • What to Wear: What is the suggested attire for this product? You may suggest what to wear to enhance customer's comfortability while joining the activity. Use Bullet point to indicate more options.
  • What to Bring: What you need the customer to bring for joining the activity? Use Bullet point to indicate more options.
  • Important Notes: What are the terms and conditions that customer must know before/during/after joining the activity/purchase the product? Use Bullet point to indicate more options.
  • Additional Info: What is the other information that customer good to know?

Submitting New Product for Approval

After done all the editing in the Product Editing Panel, review all details & information in the Preview Panel at the left no typo, all correct. 

Click "Save".  

Inform SabahTravel Account Manager once you have submitted the product. SabahTravel Account Manager will process your product and proceed for final approval before our team publish your product into SabahTravel platform.

What's Next After Submitted Product is Approved

Once your product is approved by SabahTravel, you will be notified via email and able to see your product in the Vendor Dashboard.  

Now you can manage your product (Adjust Product Details, Price, Slots, Cancellation Policies) in "Vendor Dashboard".  You can go through these tutorials to manage your products. Contact with SabahTravel Account Manager if you need assistance.

Summary

Â